How to Publish a Character
Publishing your Character is optional—you can create, edit, and test it without publishing until you’re ready.
Publishing Your Character
Ready to make your Character live? Here’s how to publish it:
-
Optionally, test your Character to confirm it behaves as expected How to Test a a Character.
Thorough testing is recommended to identify issues before publishing, ensuring your Character functions seamlessly in live environments.
-
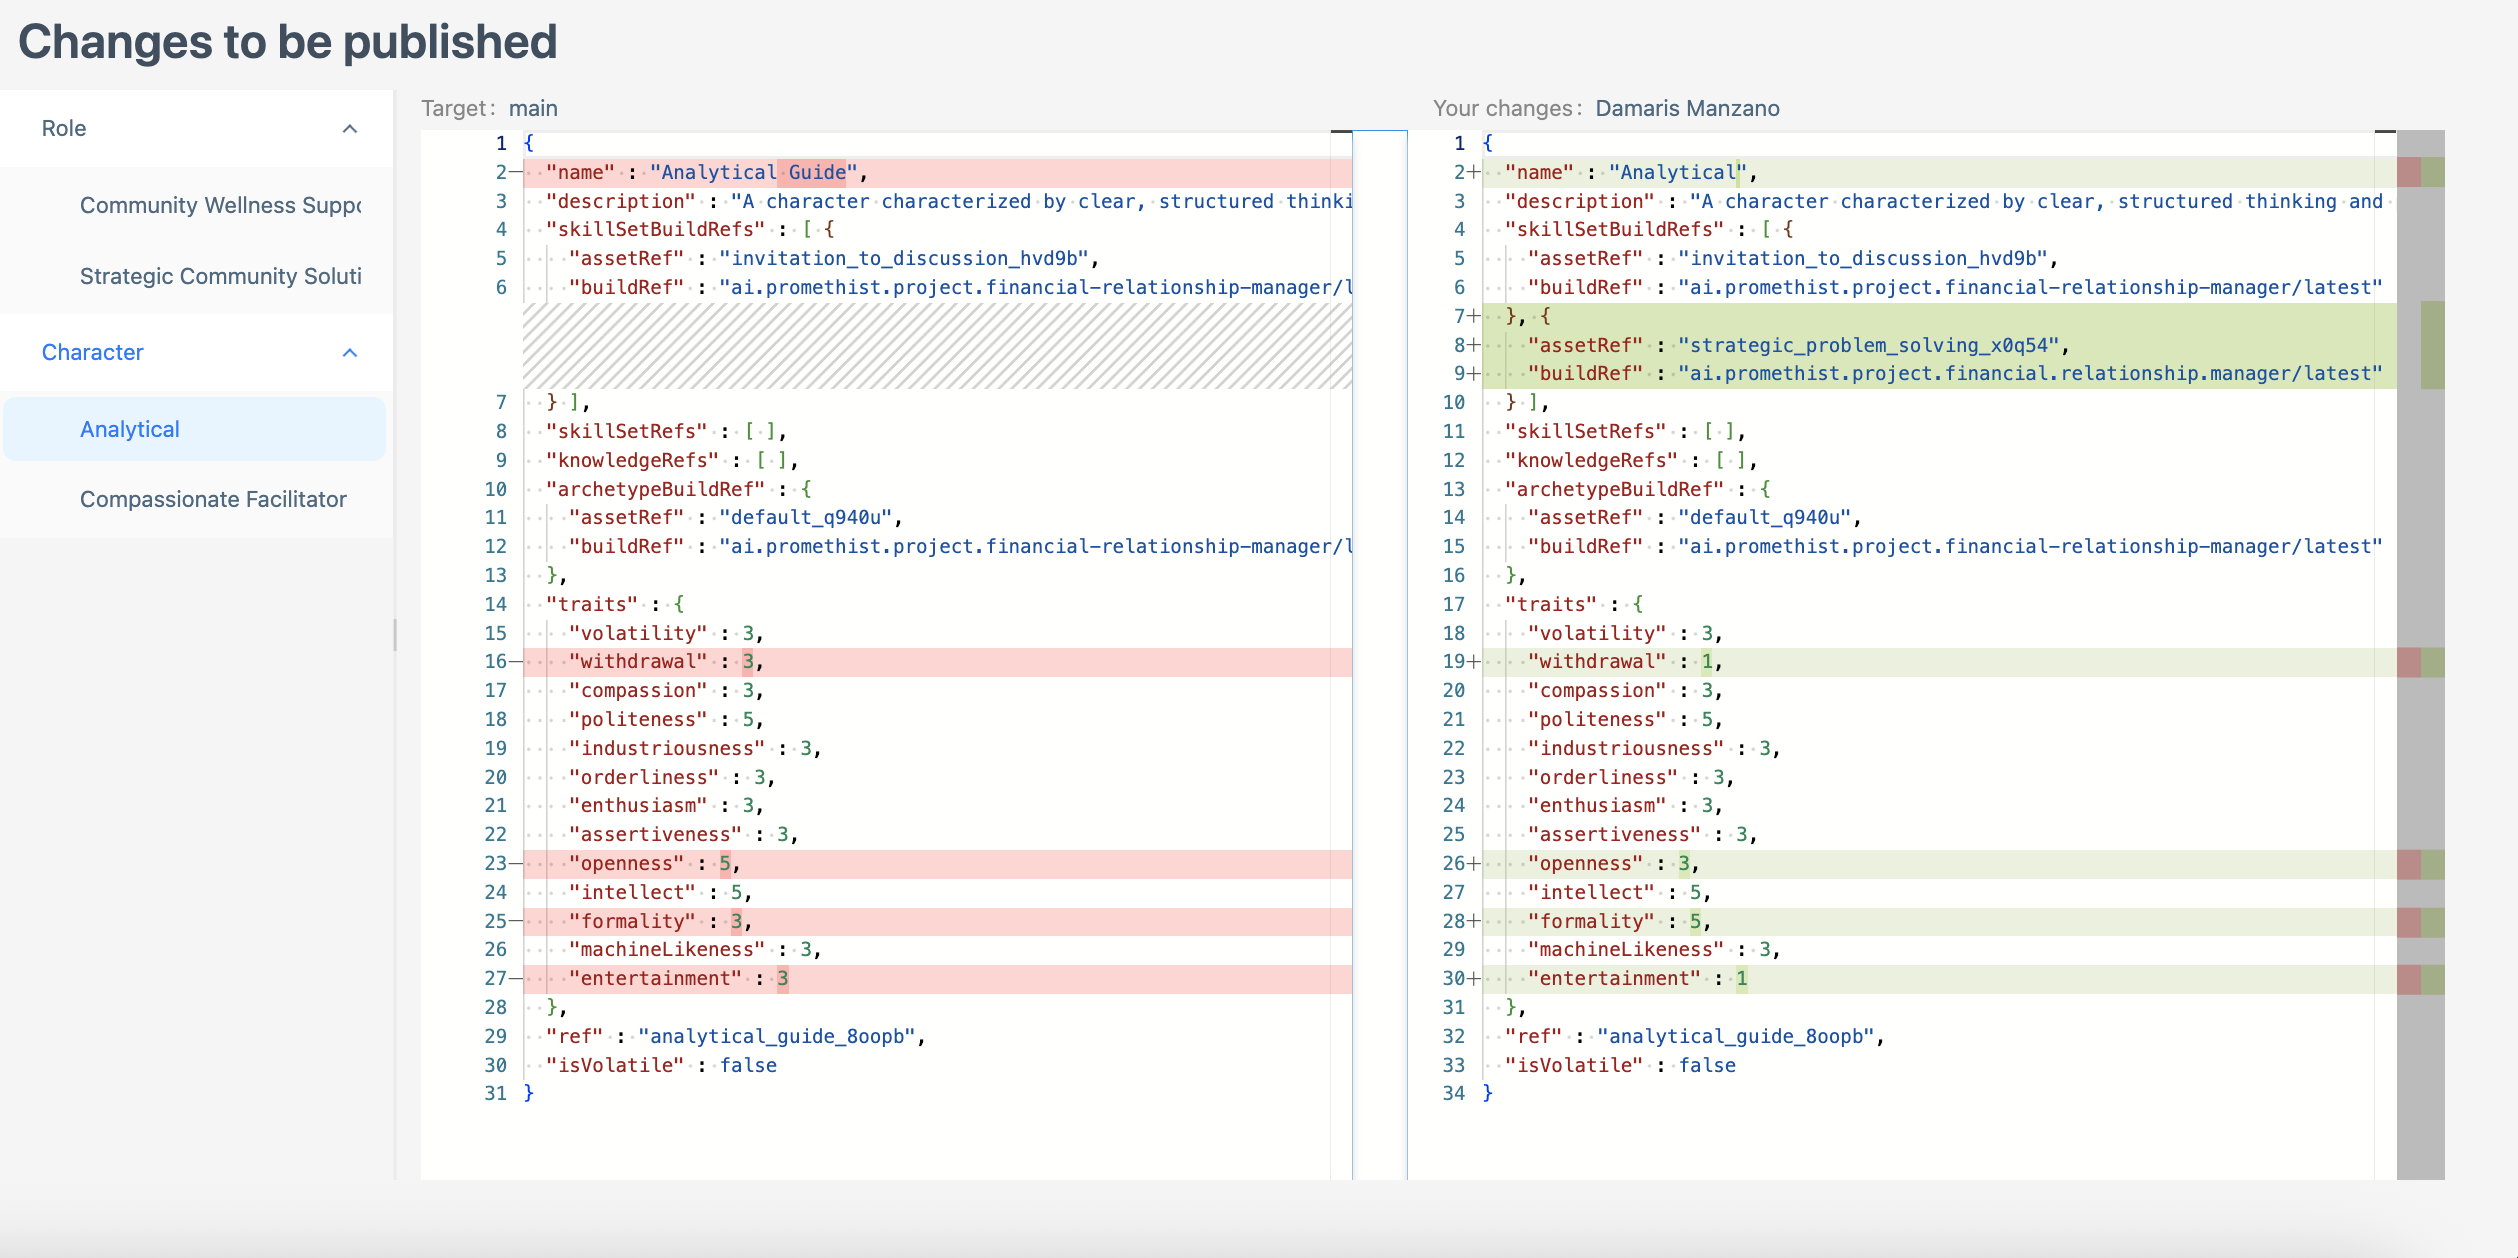
Press the Changes to be Published button in the top project panel to open a window showing all changes to be published. You can select which changes to view before publishing by clicking the different sections.
-
You can select which changes to view before publishing by clicking the different sections.
-
For an edited Character, as shown in the image:
-
The left side (in red) represents the original state, showing what will be removed or changed.
-
The right side (in green) represents the updated final version after your changes.
-
-
| For a newly created Character, only the green version will be shown, as there is no previous state to compare. |
-
Click the Publish button in the top project panel to finalize the publishing of the changes.

| Your Character is now published and active for sharing with others. |